Categories Lifestyle
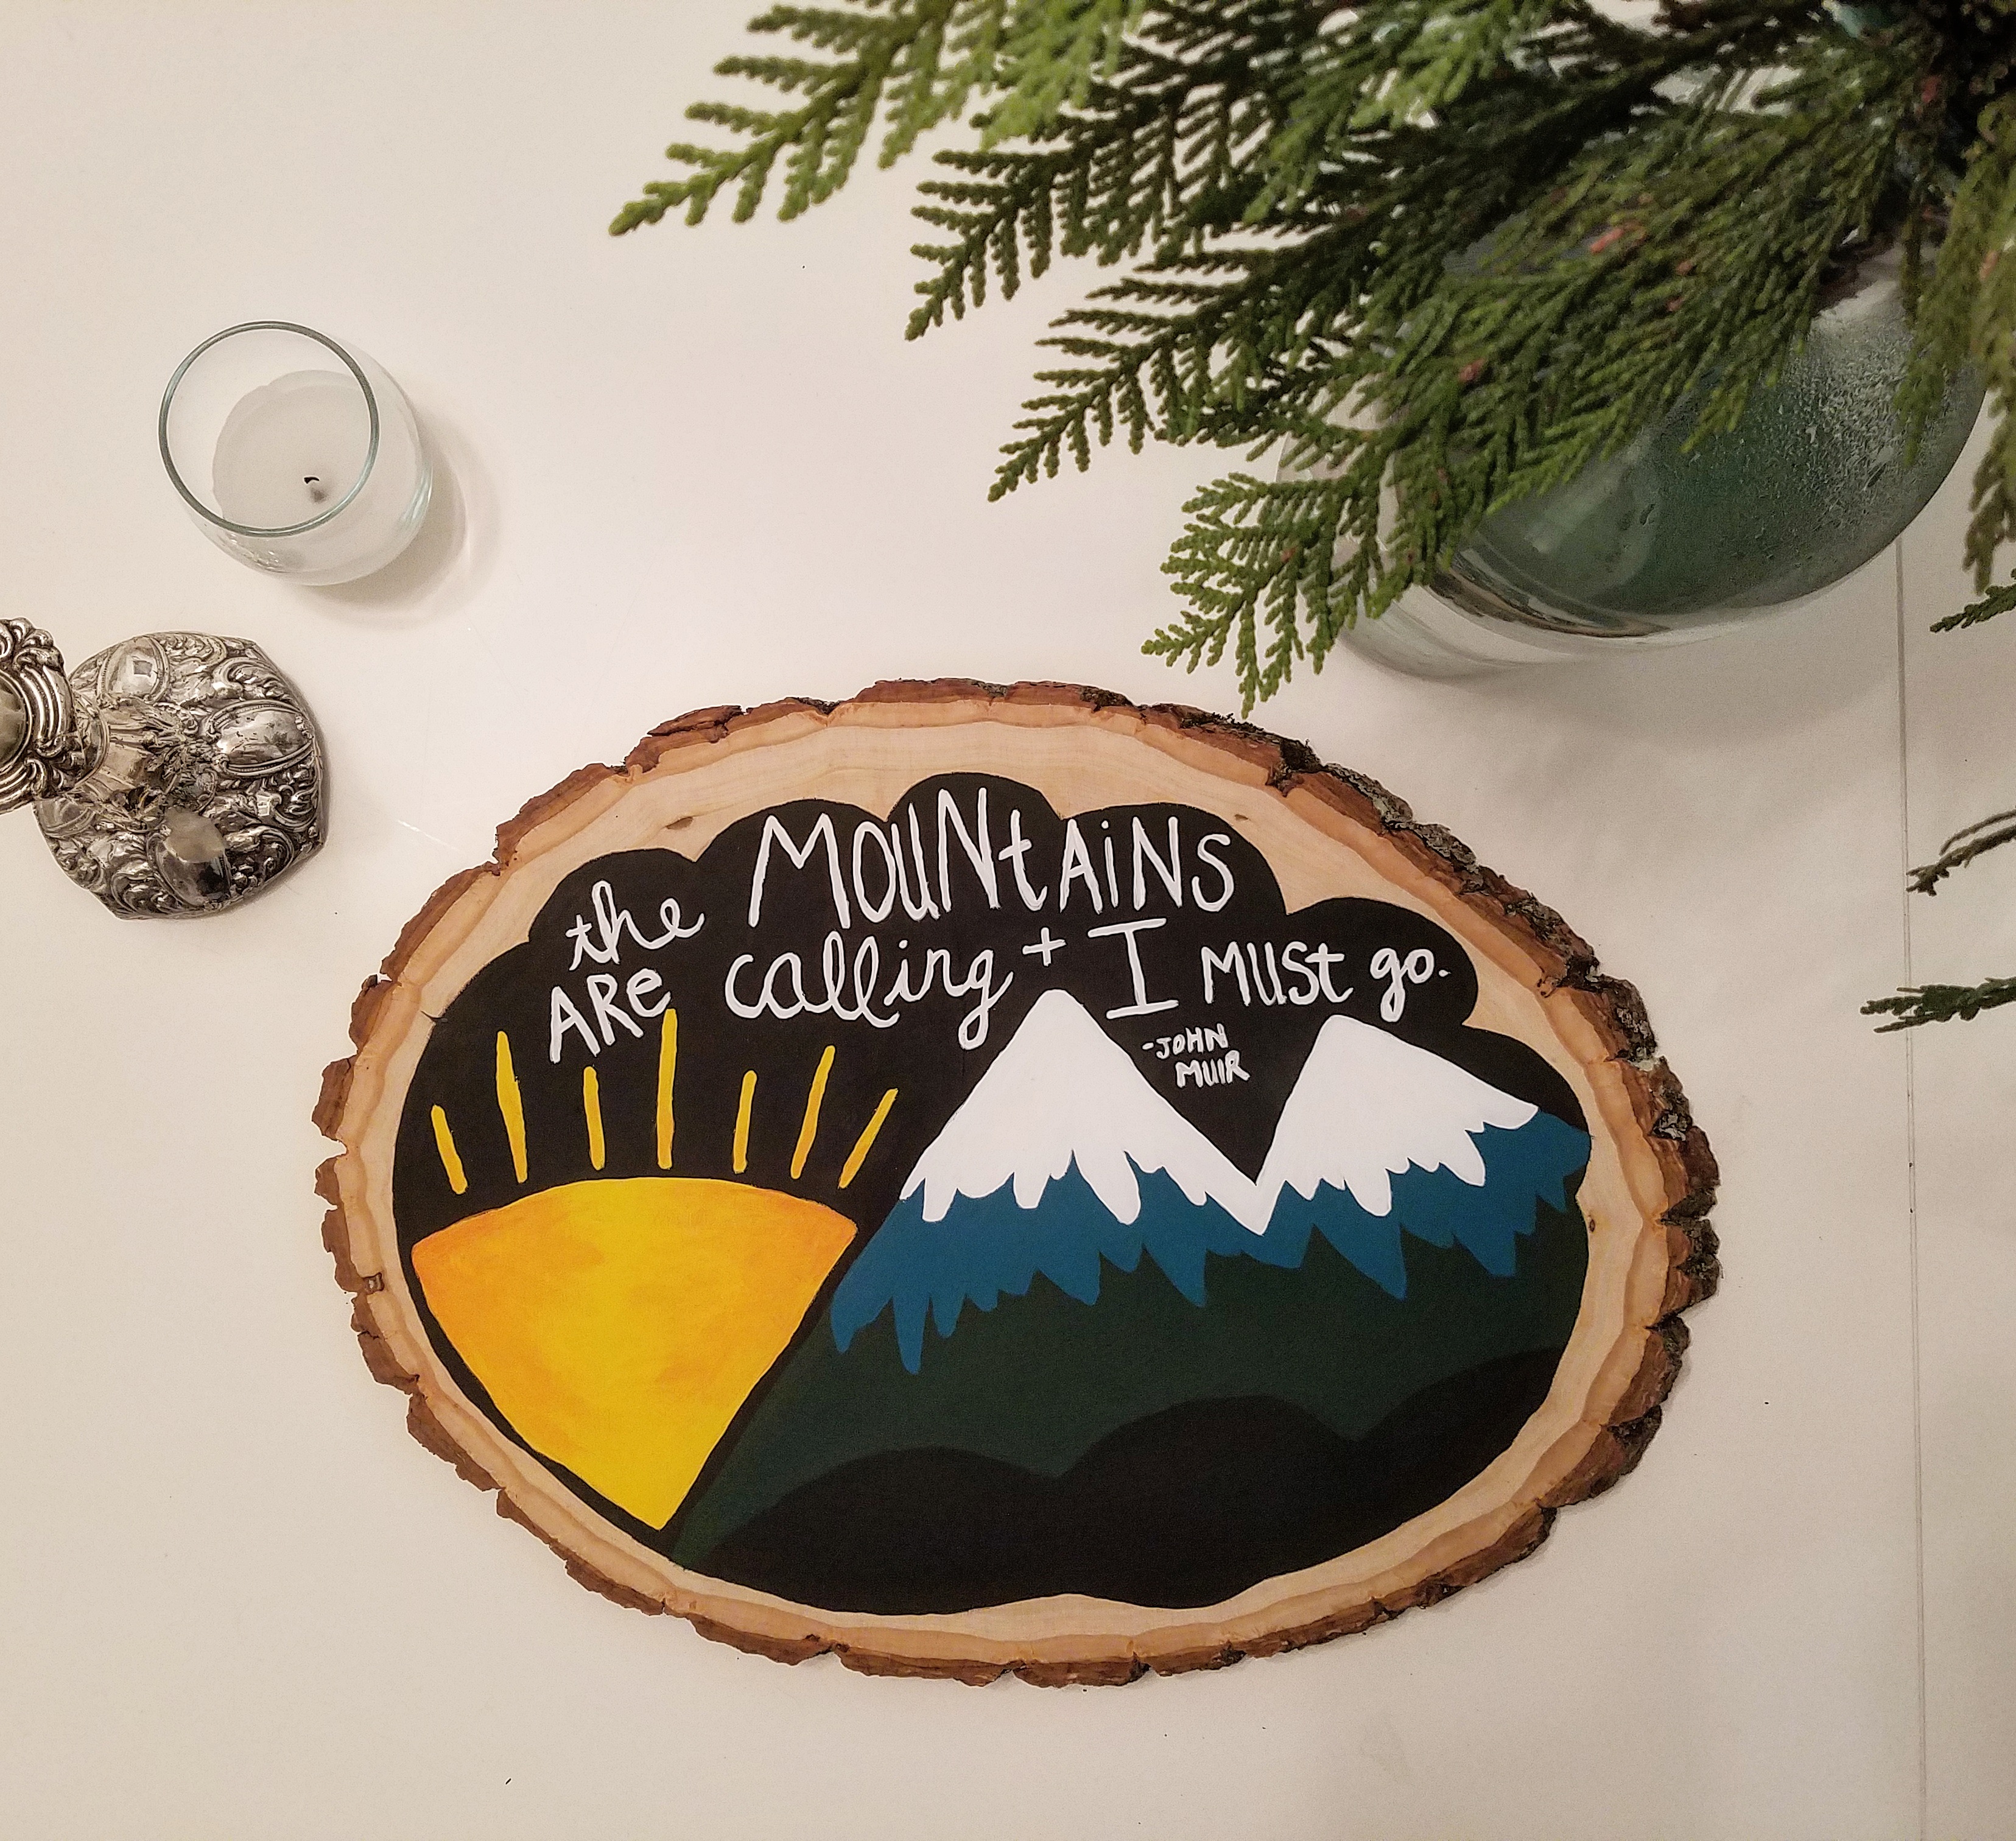
DIY: John Muir Painting on Wood

I have heard so many people say that they “can’t paint.” What I’ve learned about painting is that it can be as simple a set of fine edge paint brushes and patience (think of your piece as a puzzle).
This piece was inspired by a gift a friend had received and posted a photo of on Facebook.
Here are the supplies you will need:
- Wood round
- Dark Gray paint
- Dark Green paint
- Golden yellow paint
- Turquoise paint
- White paint
- Tangerine orange paint
- pencil
- fine edge paint brushes
- photo hook
Instructions
- Outline in pencil the area you want to paint dark gray.
- Fill in the center with dark gray paint, then complete the edges very slowly. You may need to go over the area 2-3 times. Allow the paint to dry completely.
- Use the dark green paint to form the base of the mountains. If it’s helpful, use a wet paint brush (with no paint) to outline the edges prior to starting with paint. This will allow you to decide on the area you want to paint the mountains in prior to committing to an area. You will probably need 2-3 layers of dark green paint.
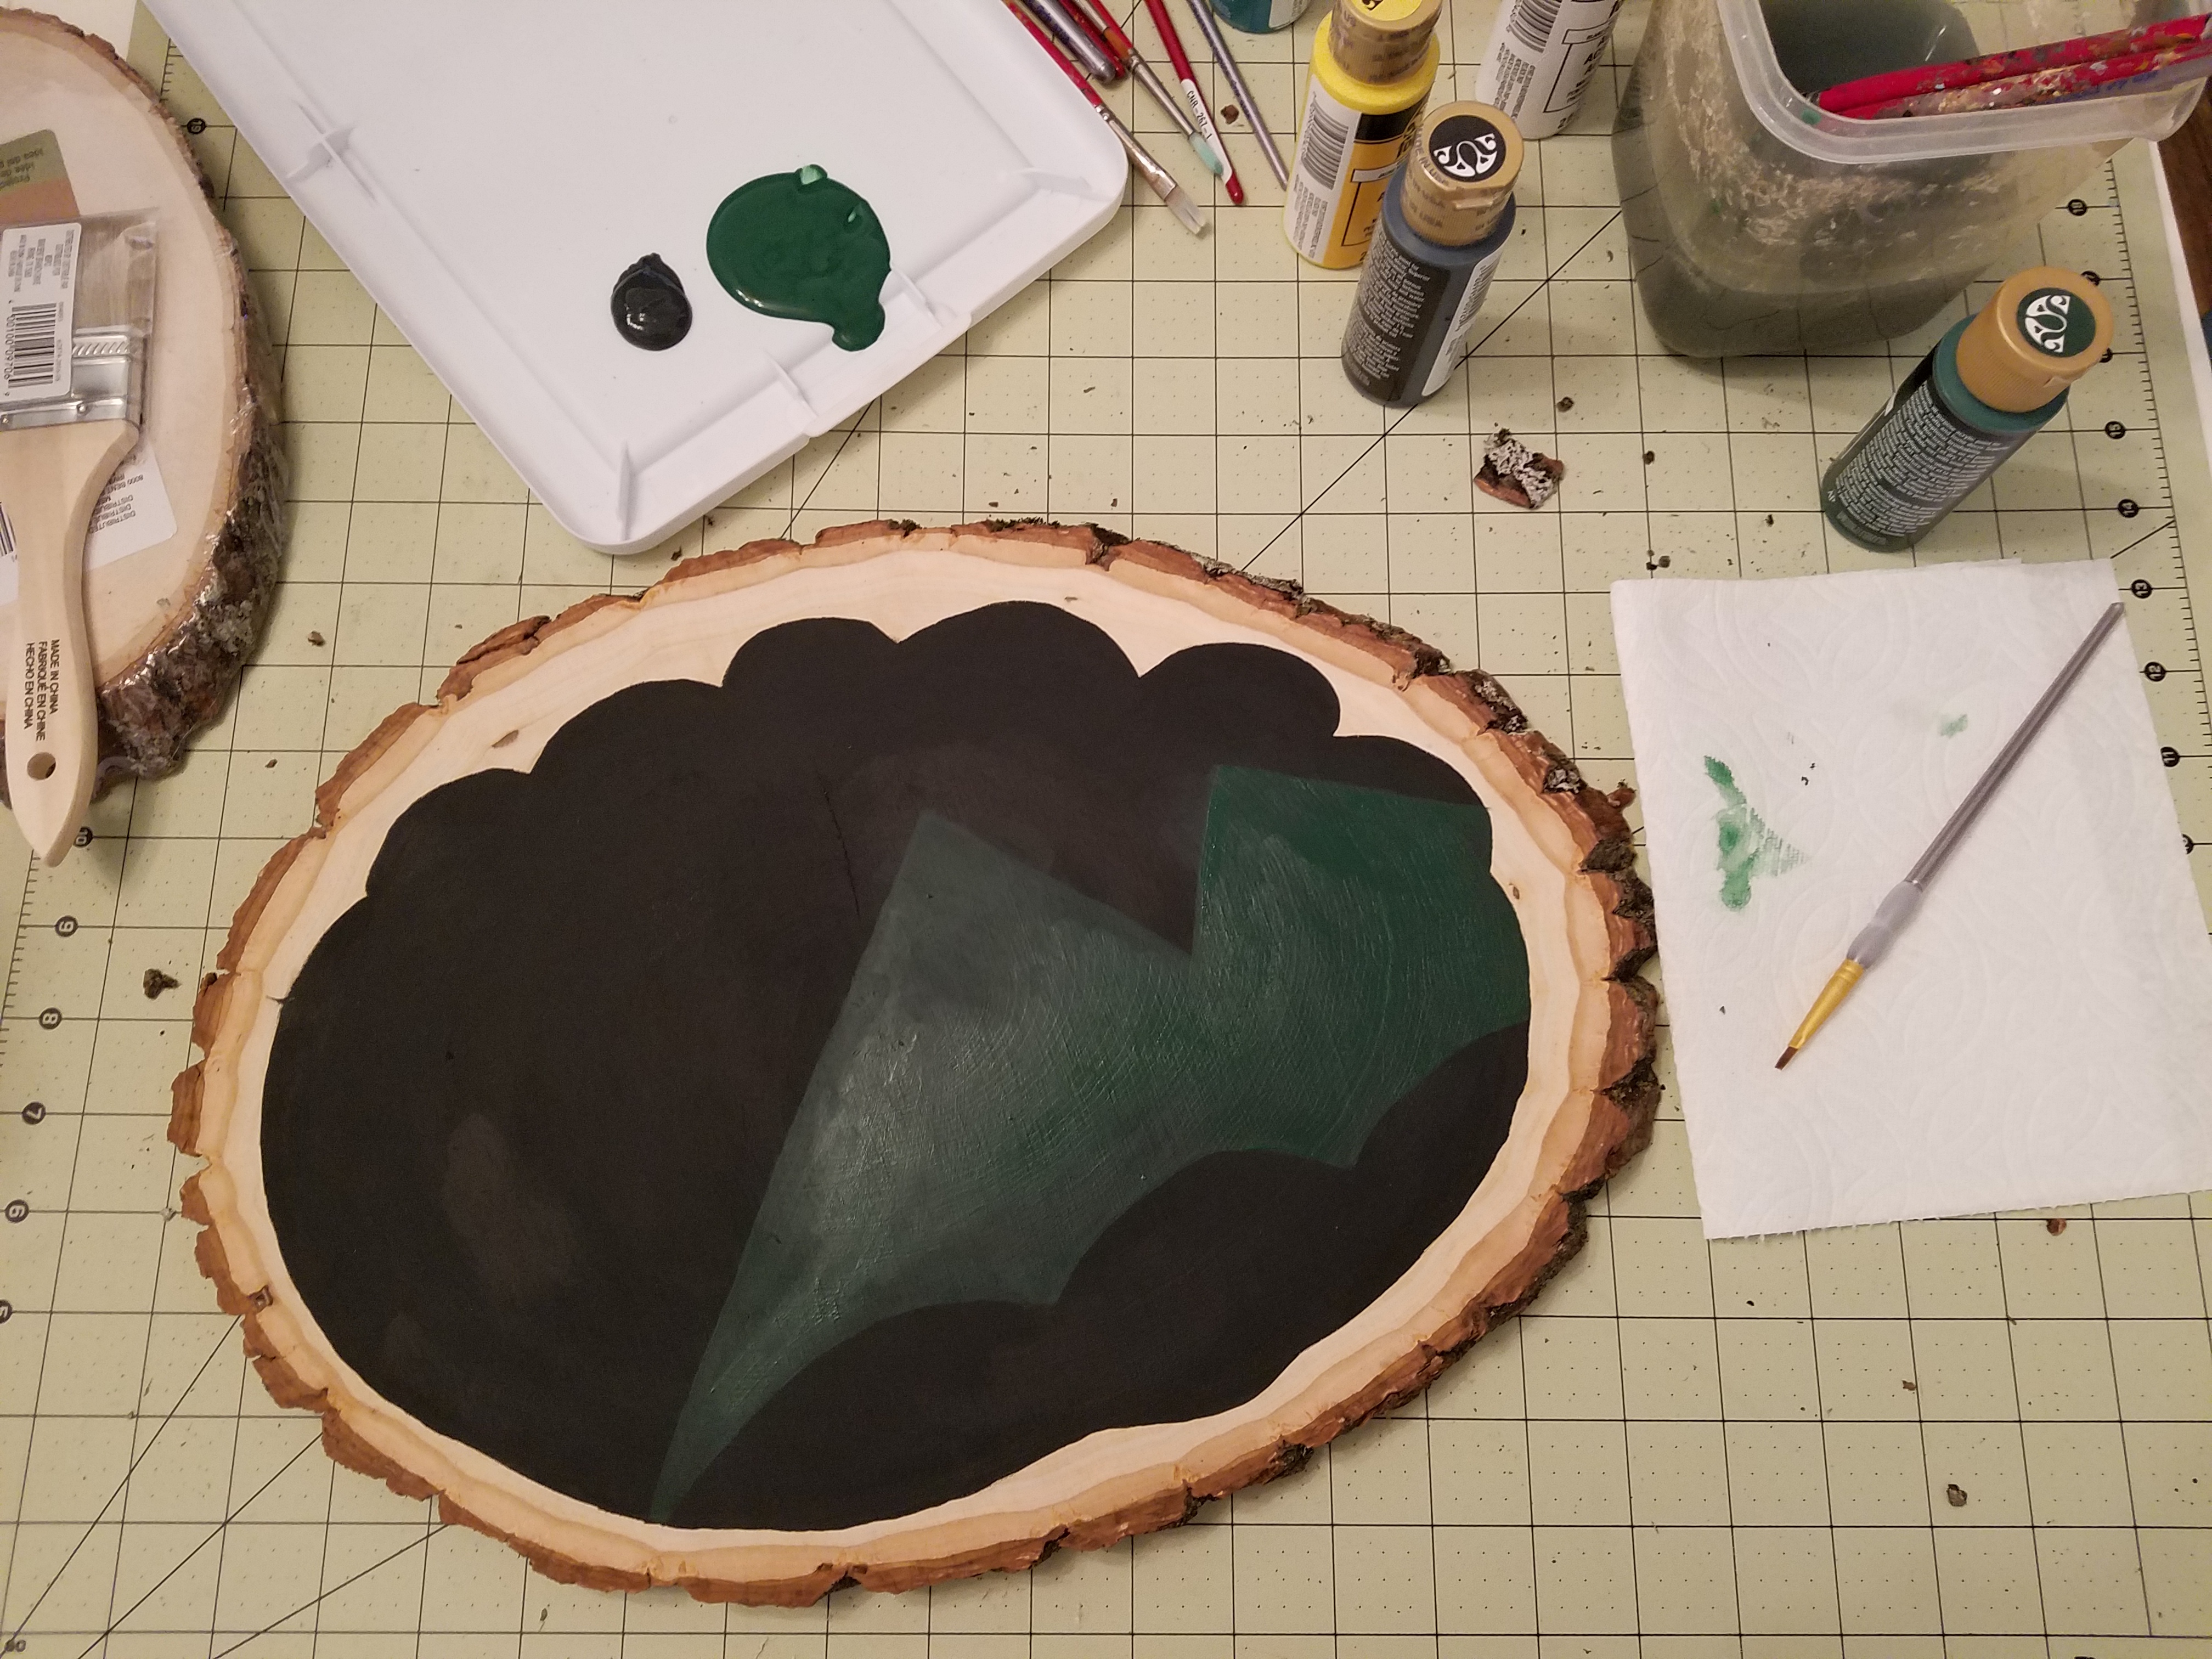
- Once you have completed the green area, begin the turquoise section. Start with the edges, going carefully around the top of the mountains, and deciding how you want the snow to fall at the bottom. Don’t stress too much about filling in areas at the bottom of the snow that you didn’t intend to – you can always balance it out! You will likely need 2-3 layers of paint for the turquoise, as well.
- Time to start the snow. I couldn’t find the correct yellow, so I added just a tiny bit of the orange to create more of a golden yellow. Start by outlining the area you want the sun to be, the fill in. You will likely need 3-4 layers of paint, depending on how thin your paint is. Save this paint for later.
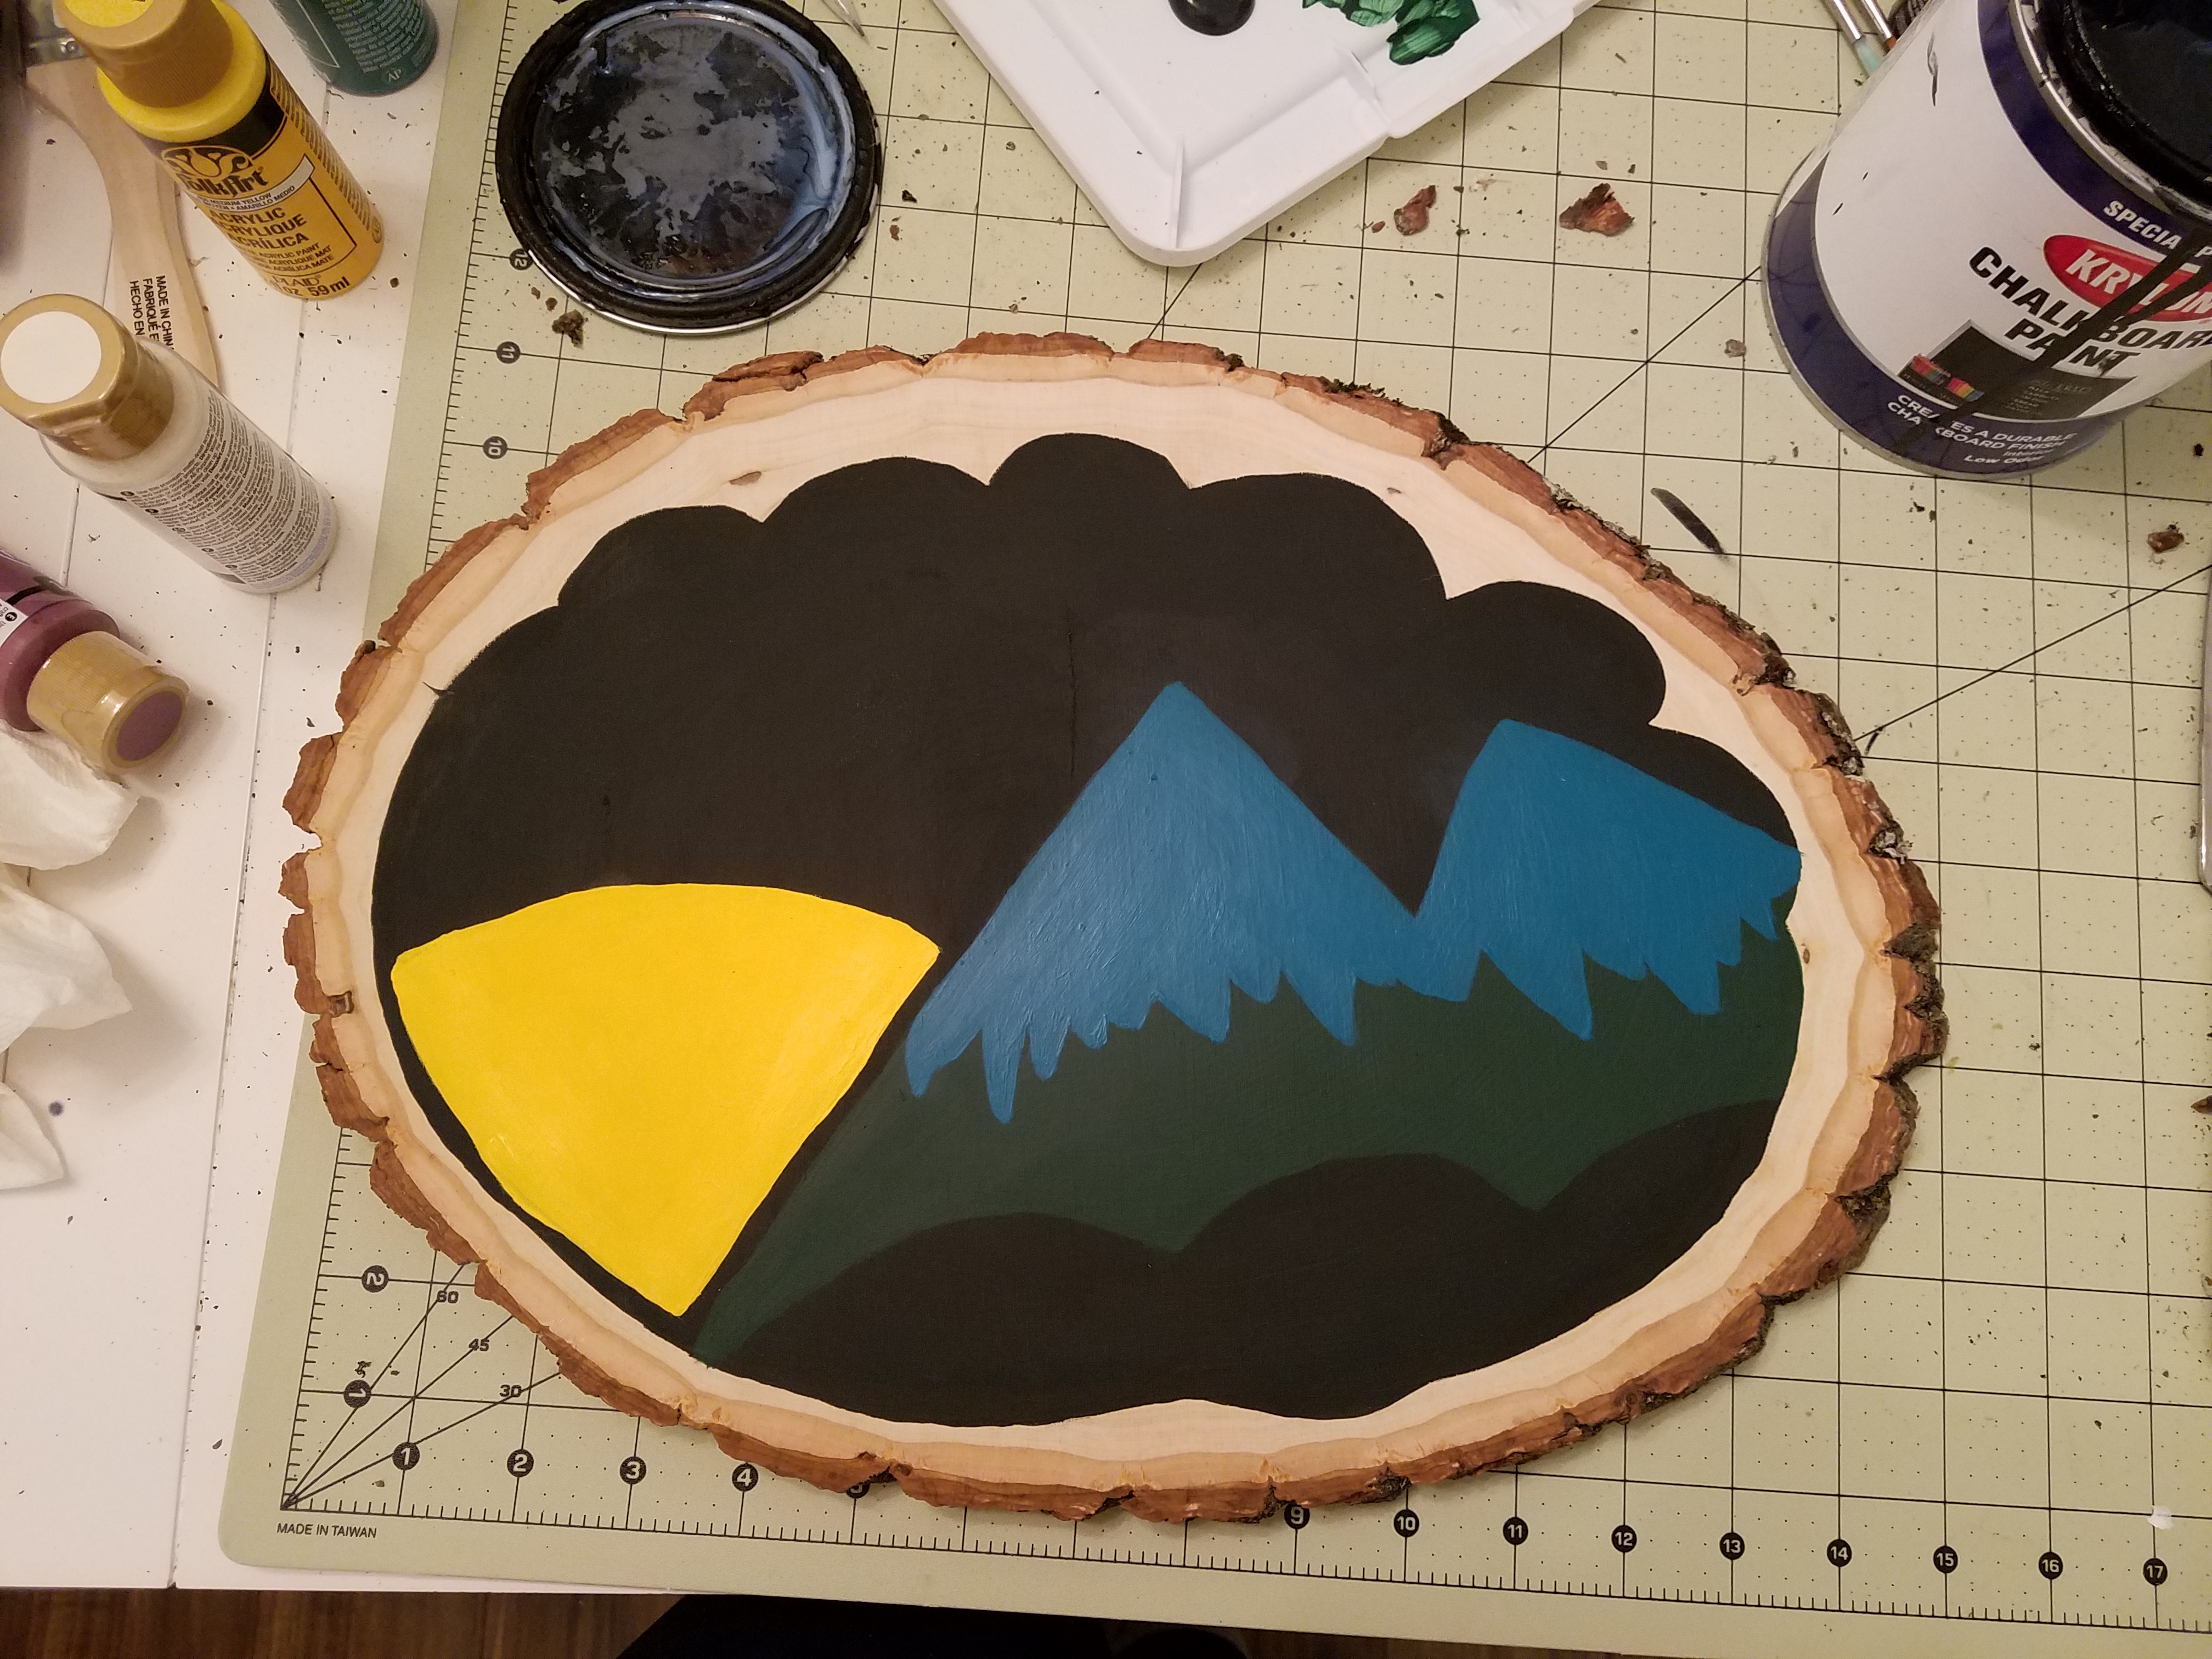
- Repeat step 4 (painting the snow on the mountains) but with the white paint. Once you’ve completed the white snow, touch up the edges to create as straight lines as possible.
- Use the yellow paint to paint the lines going from the sun.
- Create the orange by starting with the yellow paint, and add a few drops of the orange paint. Focus on creating an orange that will transition smoothly from your yellow.
- Start in the corners of the sun and bring the orange in towards the center. Use a little of the yellow paint you reserved from earlier to blend the orange. Blend a little of this light orange into the straight lines going out from the sun, as well.
- Add more orange paint to your blended orange to darken it. Start in the corners of the sun and blend the darker orange into your lighter orange. This should complete the sun!
- Now for the final piece. Use a super fine paintbrush to complete the lettering. If it’s helpful, use a wet paint brush (with no paint) to write the words prior to starting with paint.
- Let dry, and waaa-laa! Add a photo hook to the back of the wood round to hang.