How to Plan a Vacation That Leaves Room for Spontaneity

I LOVE vacation planning. Like almost just as much as actually going on the vacation. I love diving deep into a city I’ll be traveling to through research – learning about its diverse neighborhoods, the cultural values, and the history that made the city what it is today.
Researching a city ahead of time…
- Gives you a sense of direction when you arrive in the town, allowing you to relax and have fun more easily
- Keeps you from stressing over details like parking, park permits, and budget – which are no fun at all
- Ensures you pick accommodations that are central to points of interest
- Keeps you from wasting time trying to figure out what you should do, where things are at when things close, and if you’ll have enough time to do everything you would like to do
- Gives you the chance to make reservations for things that book up quickly
- Allows you to explore beyond the tourist activities
I don’t know about you, but I’m sold on why I should research a vacation ahead of time! But wait a second… I also want to be spontaneous and not feel stuck to a schedule the entire time I’m traveling. How in the world do I balance all of this research with the chance to be spontaneous?
My Philosophy on Planning
Using the word philosophy makes this sound complicated – it’s not. I live by a few rules when it comes to vacation planning that I believe leads to a vacation balanced between planned and spontaneity.
These rules are:
- Pull as much information as you can about the city, and it’s details before you leave on vacation
- Document your research somewhere that can be accessed at a moments notice while on vacation
- Under plan your itinerary
That’s it! Sounds straightforward enough, right? Here is my approach to following these three rules:
Setup Your Documentation Place
If you’re going to be spending time researching for a trip, you need a good place to store all of this information. When considering where to store this information, consider that you’ll want to:
- Pre Trip – Easily determine where to stay based on the activities you’re interested in
- On Trip – Easily figure out if any of the activities/restaurants that had been of interest during my research are in the area I’m exploring AND be able to plan my day based on where things are located easily
Google My Maps
The best solution I’ve found for this is Google My Maps. Google My Maps allows you to:
- Create custom maps for personal use or sharing
- Search for places to save to the map
- Collaborate and make maps with friends who are traveling with you
- Make and edit maps both on the web and in an app
- Categorize and style the points of interest to your liking
Setting Up Your Map
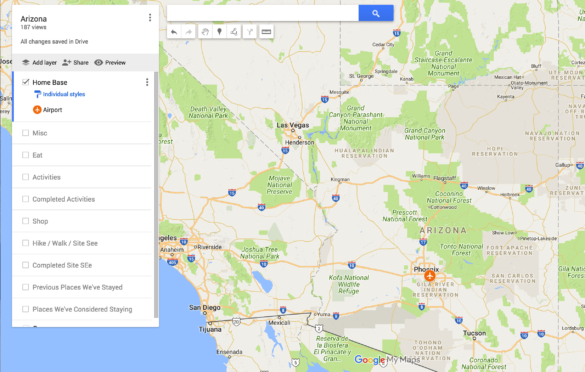
Here is how you set up your map for vacation planning:
- Create a map named the city or region you’re traveling to (i.e. San Diego)
- Add layers to categorize the types of things you’ll be researching. Note: There is a limit to the number of layers you can add. To add more categorization, I usually sort within each layer by color/icon. For “eat”, for example, I use different colors for restaurants, breweries, coffee shops, ice cream shops, etc. Such as:

- Home Base (i.e., Airport, Accommodations)
- Eat (i.e., restaurants, breweries, coffee shops, ice cream)
- Places We’ve Eaten (Use to add locations while on your trip that you might want to come back to in the future)
- Activities (i.e., San Diego Zoo, Museum, Bike Rentals, Shows, Disc Golf)
- Completed Activities (Use to add places while on your trip that you might want to come back to in the future)
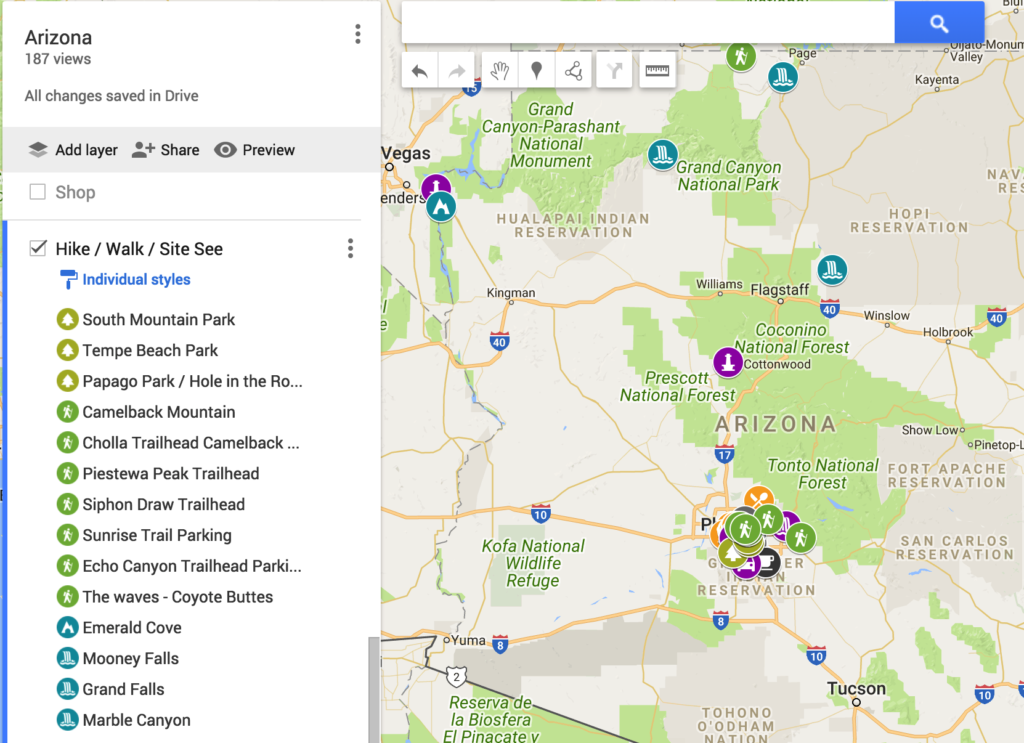
- Hike/Walk/Site See (i.e., Old Town San Diego, Balboa Park, Mission Trails Regional Park, Split Mountain Hike, La Jolla Cove)
- Shop (i.e., farmers market, gift shops, plazas)
- Previous Places We’ve Stayed
- Places We’ve Considered Staying (Use this during your research
- Start by adding the airport to the map under the Home Base. This will zoom your map into that region to make it easier to search and add points
Check out my Arizona example here.
Research

Now that you’ve set up your Google My Map, it’s time for the fun part – research! My research strategy is pretty simple – skim read and document! Nothing is off limits – if an accommodation, activity, restaurant, hike, etc. sounds even a little interesting, add it to Google My Maps. Copy and past any tips/description from the blog into the map point and add an image or two. Add any general tips about the city in the map description. Don’t’ worry about reading in depth at this phase. Save that for when you select your top activities.
Some of my top research sources are:
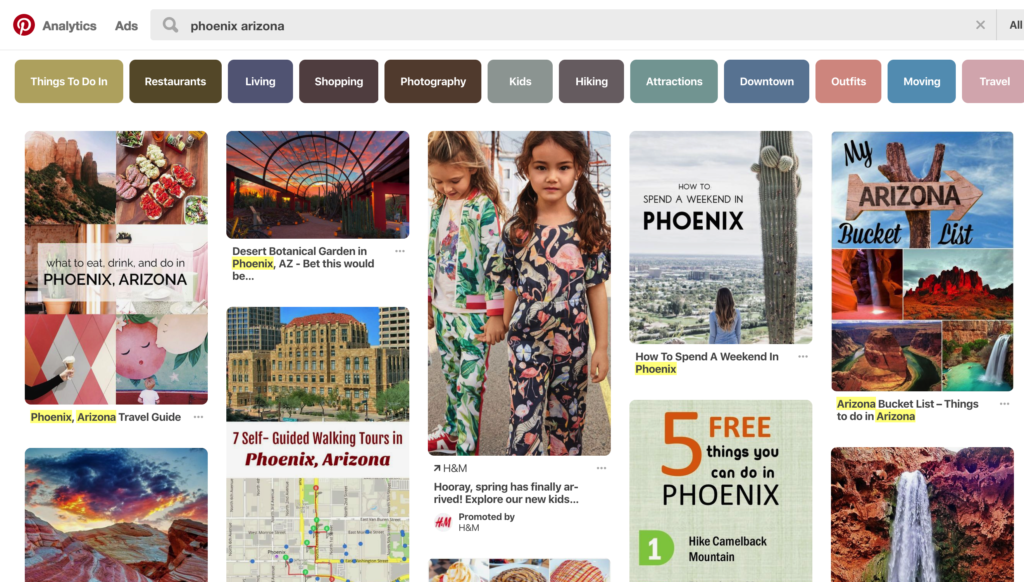
- Pinterest (aka travel blogs)
- Google (aka more travel blogs)
- Instagram hashtag for the city I’m traveling to (i.e. https://www.instagram.com/explore/tags/phoenix/)
- Trip Advisor
- Yelp
Once you feel like you’ve added a sufficient amount of points to your map, go back through and use the information to pick several must-see places! Move them to the top of their corresponding sections. Try not to fill your agenda with activities. Selecting just a few top activities from your list leaves you room for spontaneity! This allows you to be flexible and respond to what you need on vacation – whether it’s a day of rest or a spontaneous hike to a spot close by to your current location.
Use your research and selected activities to help determine your accommodation location. This will hopefully keep you from driving all over town!
Document Agenda

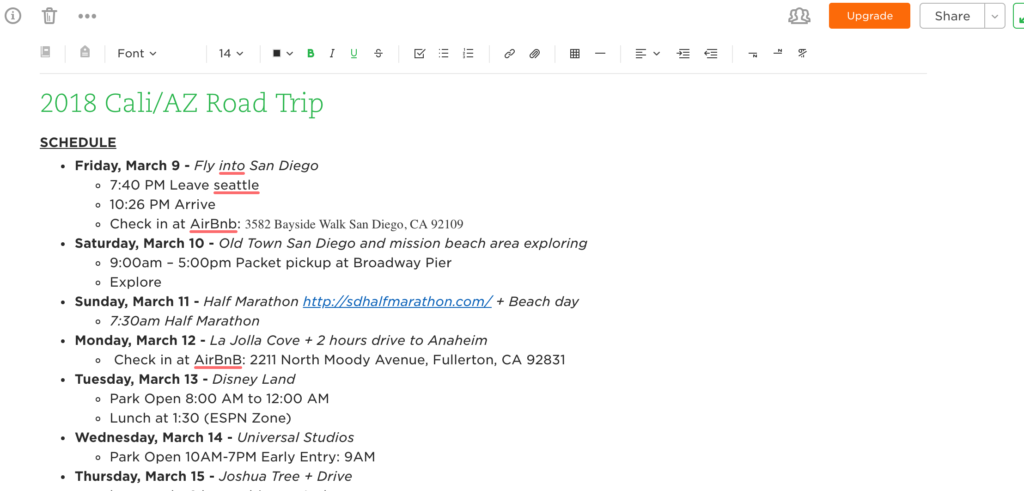
You’ve set up your map, you’ve researched, picked your top activities, and have decided where you’re going to stay. Now what? Place your agenda and any reservation confirmation codes in an easy to access spot! I prefer an Evernote note. I like to include:
- Basic agenda that outlines my top activities/reservations
- Link(s) out to Google My Map(s)
- Flight confirmation codes and times
- Accommodation reservation codes, check in/check out times, addresses, and phone numbers
- Car rental confirmation codes, pickup locations, etc.
- Activity confirmation codes/pdf tickets
Setting Up Your Phone
Setting up your phone for vacation is a very simple, yet surprisingly stress reducing, step to making your vacation just a little more relaxed! Here are my suggestions:
- Download offline maps to Google maps. If you’re going where the Internet is slow, mobile data is expensive, or you can’t get online, you can save an area from Google Maps to your phone or tablet and use it when you’re offline. I’ve used this feature while backpacking and traveling in Mexico and I’m anticipating on using it while driving through Joshua Tree where I won’t have cell reception! Downloading map data will give you the peace of mind that you’ll be able to get to your destination without fretting about a GPS signal or battling a giant paper map. Google provides instructions here.
- Download Insurance Apps. Most of us can get our car insurance card through a phone app. If you’re going to be driving, ensure that you have your insurance app downloaded to your phone AND that you know your login so you can quickly pull up your card in case of an emergency. It’s good to carry a paper card, but this is one more way to rest assured you’ll have the info you need at your fingertips.
- Create a Shortcut Directly to Your Trip Itinerary. As mentioned earlier, I keep my entire trip itinerary in an Evernote note. I create a shortcut on my phone that will link me directly to this note. You could do the same with a Google doc, Word doc, memo, etc. No more scrolling through lists of notes/documents or thumbing through a stack of hard copy papers to find your itinerary!
- Create a Shortcut Directly to Your Budget. As mentioned earlier, I keep my budget in a Google Doc Spreadsheet. Create a shortcut on your phone that will link directly to this file so you can quickly add in your costs as they come up! I do recommend a hard copy that you can pencil into if you’re not going to be connected to data or wifi.
- Download Google My Maps. It’s no secret that I live and breathe in Google My Maps while planning my vacations. You can do the same things in the mobile version that you can in the desktop version. Keep your trip info close at hand!
- Download Airlines Apps and Login. Most apps let you check-in and use tickets through the app, now! They will also notify you of flight delays or gate changes.
- Download Accommodation Apps. The Airbnb app will allow you to communicate with your host or get details as your travel. Hotel Apps are also getting quite popular – Hilton has an app that lets you check-in on your phone as well as use a digital room key!
- Download Attraction Apps. Many amusement parks (i.e. Disneyland, Universal CA) have apps with show times, park maps, dinner reservations, etc.
- Download Taxi Apps. Whether you like Lyft, Uber, or another service, download the app and have your credit card info already entered, so you aren’t scrambling when you need a ride!
- In-Flight Entertainment Apps. Some flights require an app downloaded before the flight to use wifi, watch movies, etc. Alaska Airlines uses the “Gogo Entertainment” app.
- Download Offline Content on Entertainment Apps. Download offline content before leaving on your vacation, such as movies on Netflix, books on Audible, and playlists on Spotify. This way, you won’t have to be connected to wifi/data to view/read.
- Download Currency Apps. I like XE Currency
- Download Yelp. Check out the local food scene wherever you end up!
- Setup Your Homescreen. Move all your go-to vacation apps and shortcuts to the home screen of your phone. This way everything will be at your fingertips. No wasting time scrolling through pages and pages of apps.
- Clearing Up Space. Make sure you have a lot of room for photos! Delete old apps, transfer old photos to the cloud, clear up your downloads, etc.
You wouldn’t think such simple changes could help create more ease on your vacation but think again when you end up in a spot without GPS reception or trying to chase down wifi to download a playlist for your drive.
So there you have it! Have fun planning your vacation that leaves room for spontaneity! Feel free to comment with any questions or additional ideas!
